|
So, you want a graphic with your glitter name. Well, PSP has just the thing, it’s called the
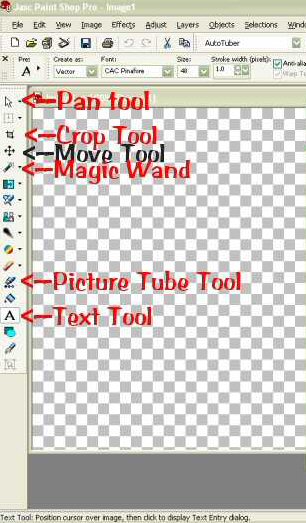
‘Picture Tube Tool.’ PSP will have some “built in.” If you want a certain graphic, you can Google
PSP Tubes or go to this site: http://home.fuse.net/wizardpygal/ and find your graphic. Once you find the one you want, click on it and save
it. Most of them are in Zip format, you will need to unzip it. Then on your computer, click on your Documents, there should
be a file named My PSP8 Files, click on it. Then click on Picture Tubes, now drag your new picture tube into that file. When
you open PSP, and click on the Picture Tube Tool, you should be able to find it. If you come across tube picture that won’t
work that way, you can use the Autotuber tool in the top toolbar. Just click on the picture you’ve downloaded and choose
PSP to open it. Duplicate the pic by pushing shift & D at the same time. And then click on the autotuber tool, when it
gives you the message “this layer as more than one layer...” click OK, and click OK 2 more times. Then Name your
tube and click OK again. Your image should then come up under your picture tube tool. You can also make other images that
aren’t tubed tubes, by using the Magic Wand, and or the eraser tool to delete the background from around the image you’re
wanting to use.
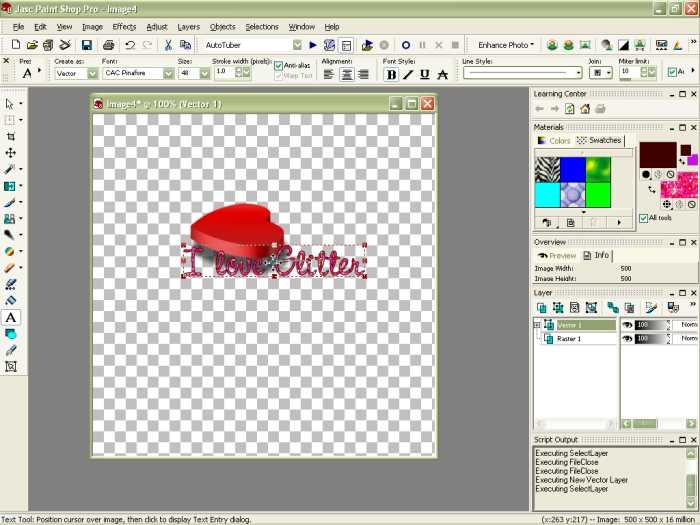
Now, open up a new image layer like you did with the glitter name in the Glitter Name tut on this site.
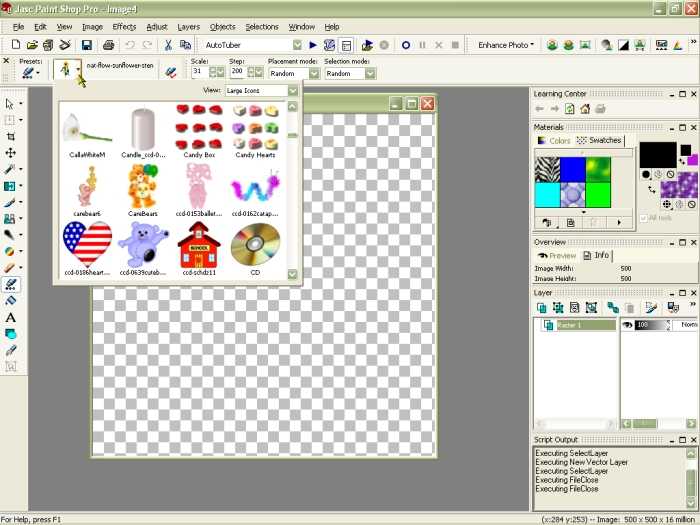
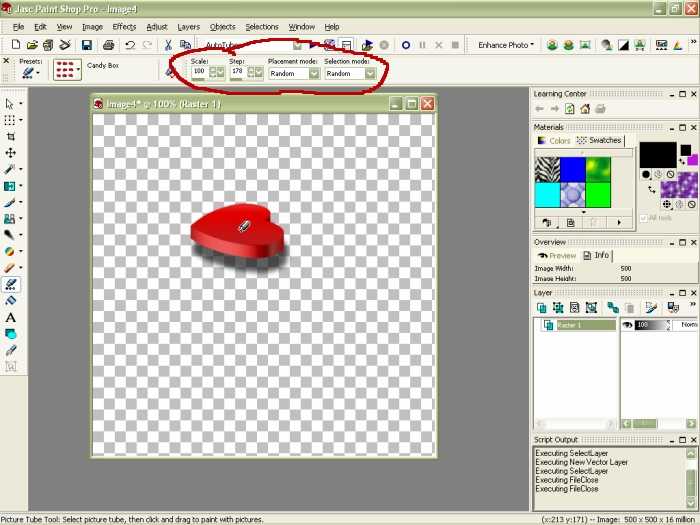
Go to your Picture tube tool. At the top tool bar, choose your picture and go to your empty image and click. You should then
see your picture, if it’s too big, go to edit and undo, then go to Scale at the top and adjust the size until your picture
is as big as you want it. If you have a tube that has more than one picture, for ex. 8 hearts that are different colors and
you want a certain color, under ‘Selection mode:’ choose ‘Incremental.’ It will then put the pics
in order instead of random.
 Once your pic is how you want it, then go through the steps to make your glitter name. You can use
the text tool to move around your text or use the Move Tool to move to your image. If you want to use more than one image,
open a new raster layer under ‘Layers’ to put one of your pics, or image, so you can move them independently.
You will then animate it like what is shown in the Glitter Name tut. Here is what we made in this
tut.
|