|
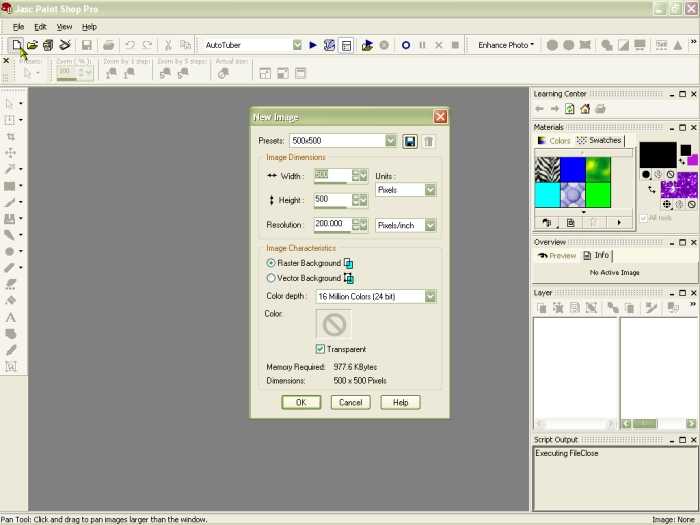
First thing to do is to open a new image in PSP. You will want to set your dimensions to 500 X 500, just gives you room
to play with. Set your background to Raster Background, color depth to 16 million colors and check the Transparent box.
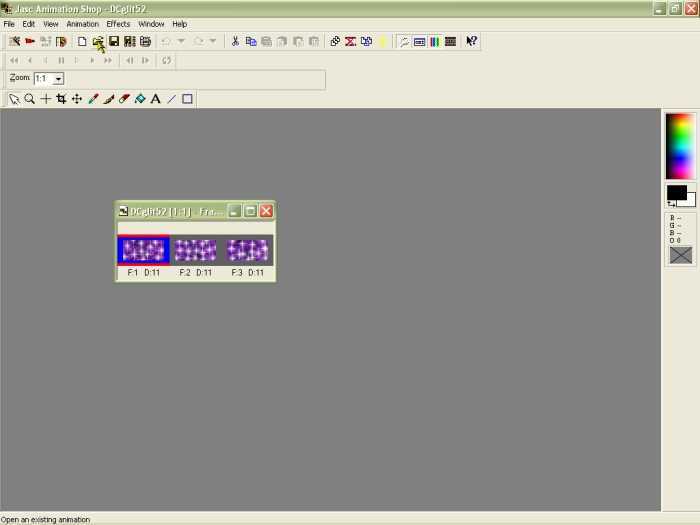
Now, open Animation shop, and go to the picture of a file, or go to ‘File’ and choose ‘open.’
You will then need to find the glitter you have saved and choose the one you want to use in your glitter name. It should come
up as 3, or more, frames.
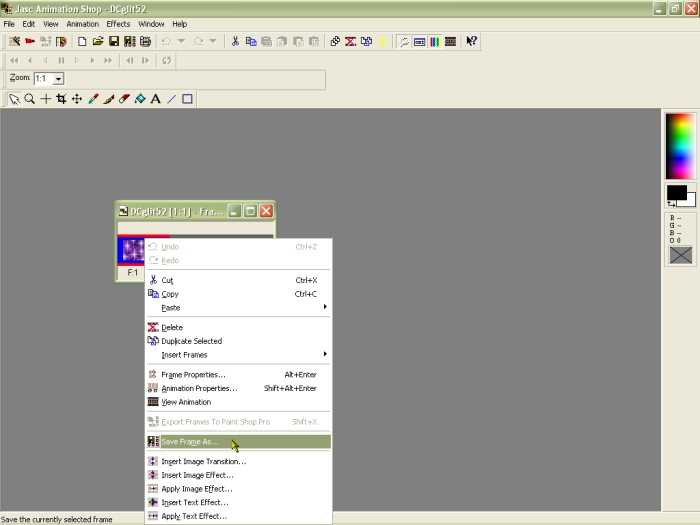
Right click on each frame and click ‘Save Frame As...’ and save them in your PSP swatches folder (I think
it automatically saves to that folder, but if not, then you can choose it in the top dropdown menu on the save screen). Do
this with each frame of your glitter (most glitters have 3 frames, but some will have more). Now go back to PSP.
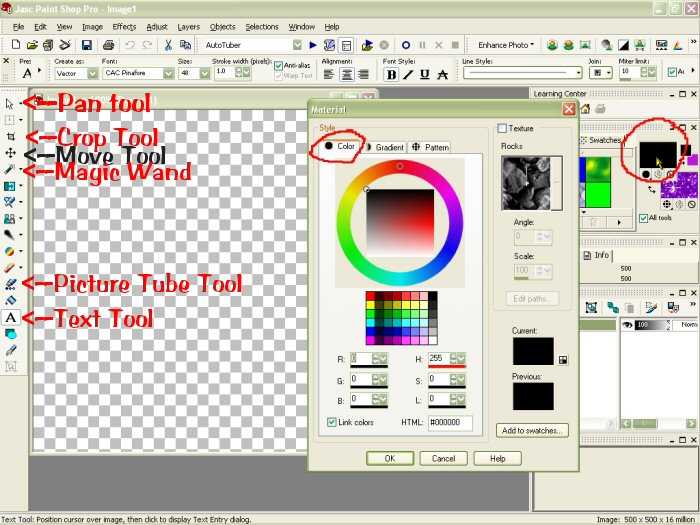
Go to your Materials menu (if this is not visible on your work area, go to View at the top and click on Palettes, and
then click on Materials). Click on the top box of color and choose a solid color.. this will be your outline on your glitter
name. In my example, I will choose black.
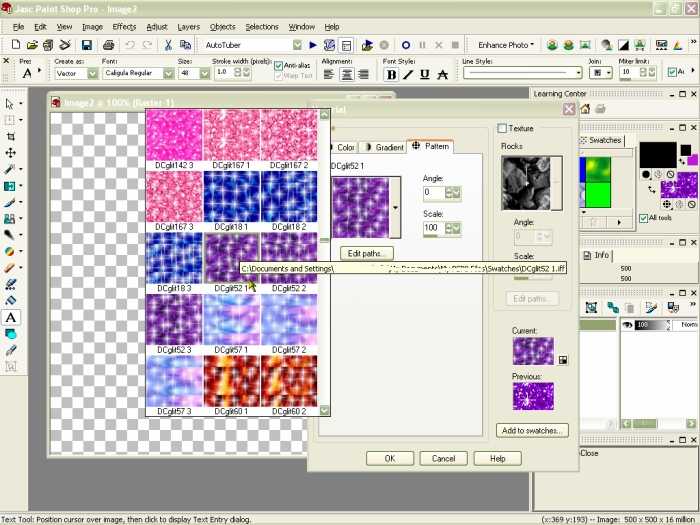
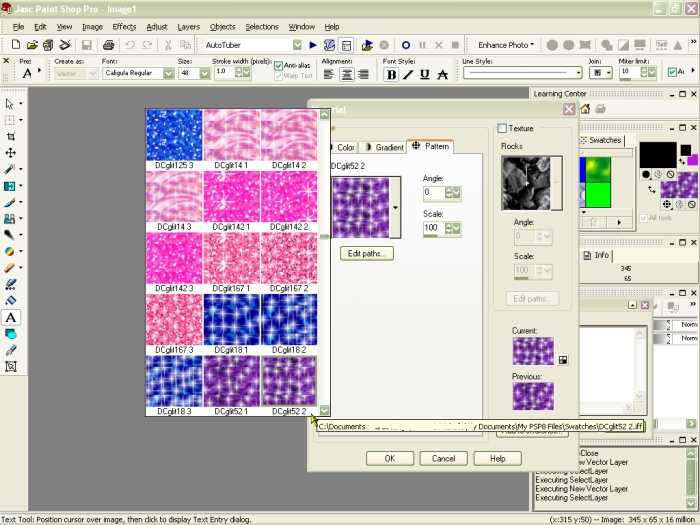
Click on the bottom color, and click on the tab labeled ‘Pattern.’ You will find your glitter here.
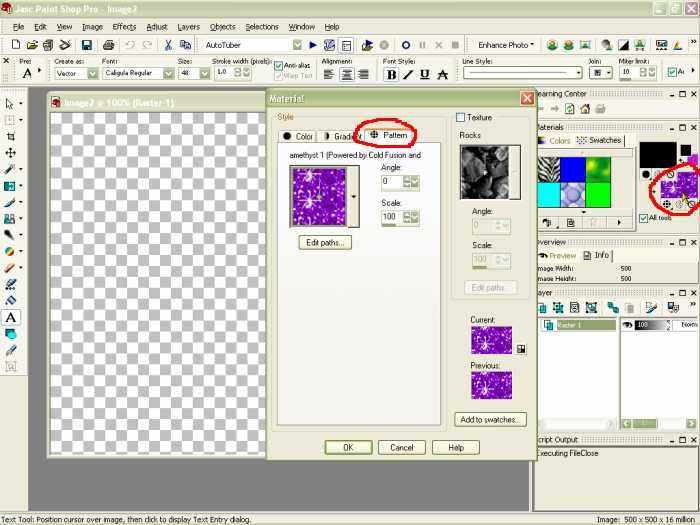
Click on the first frame of the glitter you’ve chosen.
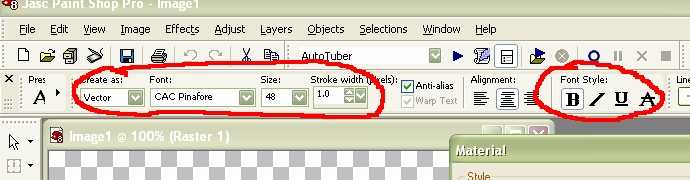
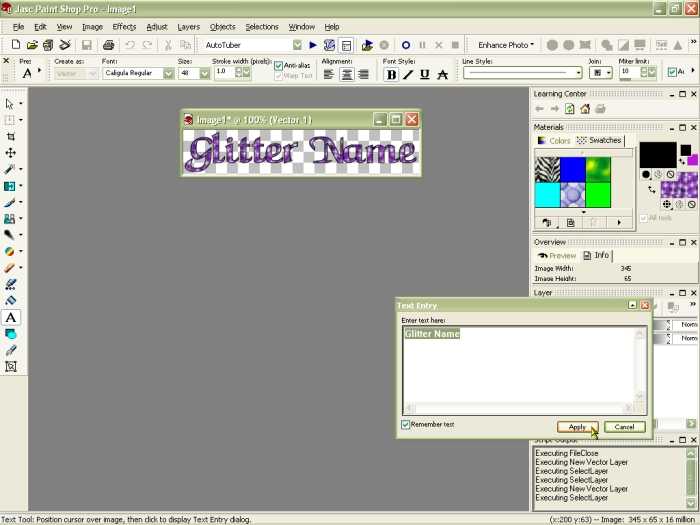
Now you are ready to make your name. Click on the Text Tool. Again, if this is not on your work area click again on View,
then on Toolbars and then on Tools. Now move your cursor (should look like a cross with an A beside it) over your opened Image
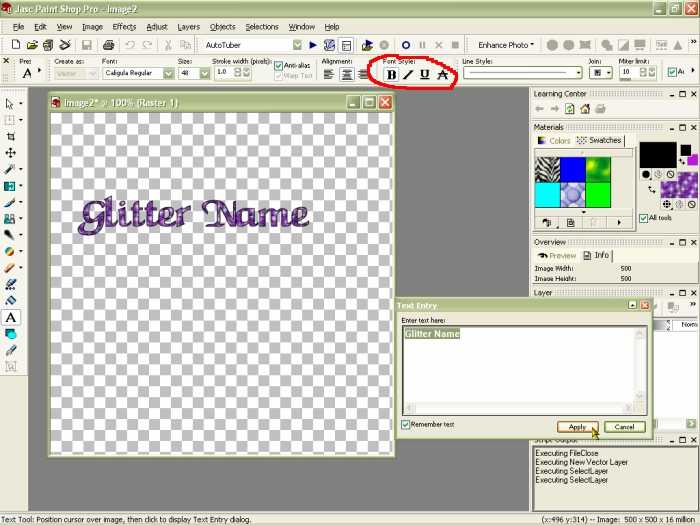
and click. It will then bring up a box that you can type in your wording. As you type it, you should notice it will be filled
with the glitter you chose. Now, at the top it will have the font, with your box still opened and your wording highlighted,
you can choose the font you want to use. You can also adjust your size, I usually set mine on 36 – 48 depending on the
font used. The Stroke Width (pixels) should be set to at least 1.0. You can set it more or less, depending on how much outline
you want. If you want it less than 1.0 you will have to type it in manually (for ex. If you want it 0.3). Now, you should
see your name in the glitter you chose and outlined in the color you chose.
Now you need to crop your name. Go to the crop tool and drag your cursor over the name until you have a red box. Whatever
is inside that box is what will be included, then you will double click to finish cropping.
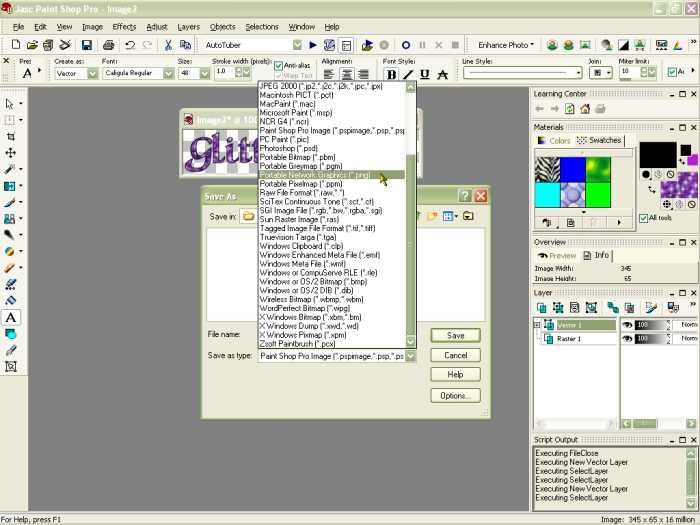
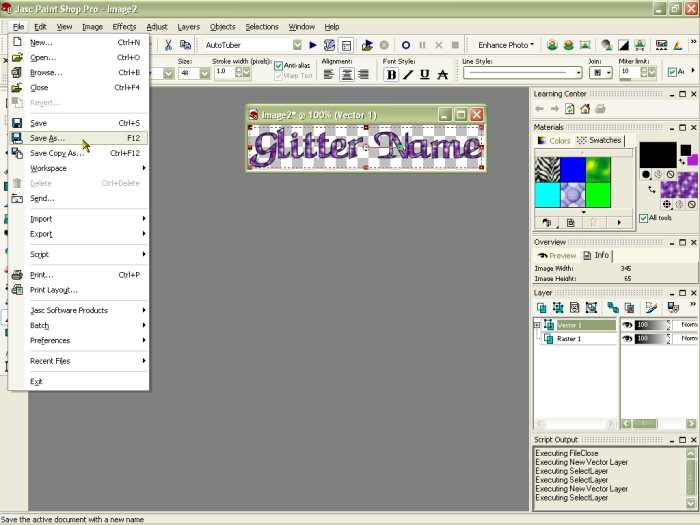
Now, save your image. Go to ‘File,’ ‘Save As..,’ the save menu will then pop up. You can label your
image or you can use the label PSP automatically gives it. Then on the ‘Save as type:’ you will need to save
it as a .PNG, or Portable Networks Graphic.
Click your Text Tool again and go back to your image, you should see a cross with [A] on the side, click your picture
again. It will bring back your text box.
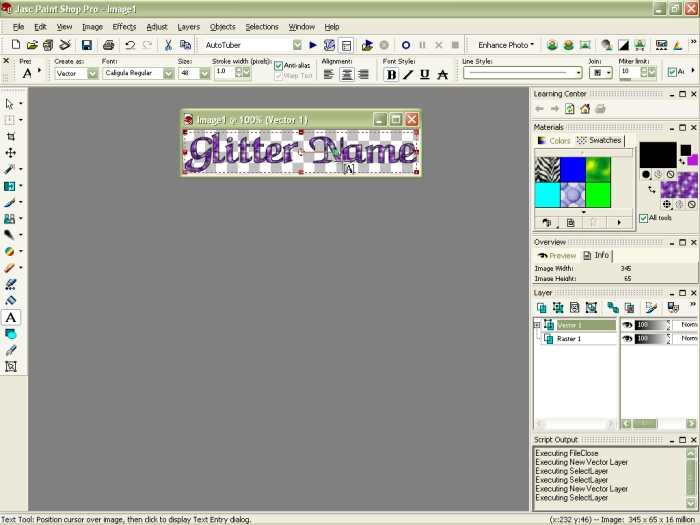
Click on the bottom color (where your glitter is) and choose the second frame of your glitter. Click OK and on your text
box, click apply. Then click “SAVE AS” again. It will bring up the name you chose to save it, and it will already
be in .png format, so save your 2nd pic with a number 2. You will need to then go back again and choose your 3rd glitter frame
and save it as number 3, and so on until you’ve gone through all of the frames of your glitter.
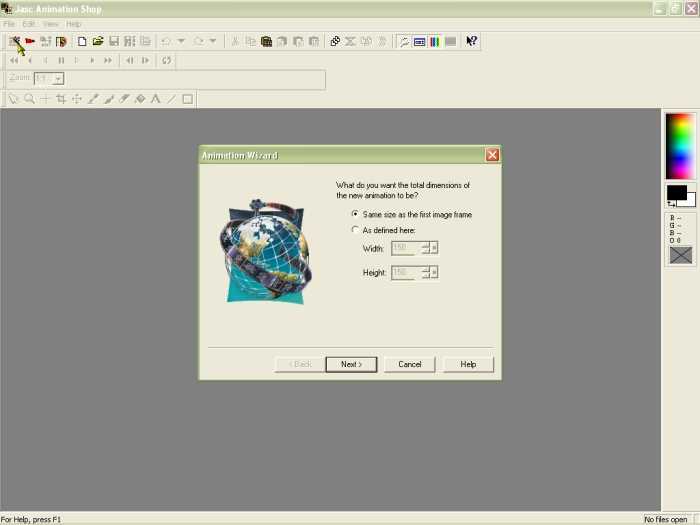
We can now animate your name. Go back to Animation shop, and click on Animation Wizard (the film icon on your tool bar
or under file). On the first box that appears, check the dimensions as ‘Same size as the first image frame.’ Then
click next. Click transparent on the next box, then click next. On the box, click ‘Centered in the frame’ & ‘With
the canvas color.’ Also, check the ‘Scale frames to fit’ box, then next. On the next frame click ‘Yes,
repeat the animation indefinitely’ and choose how fast you want your glitter to blink. I usually set mine on 10, then
click next.
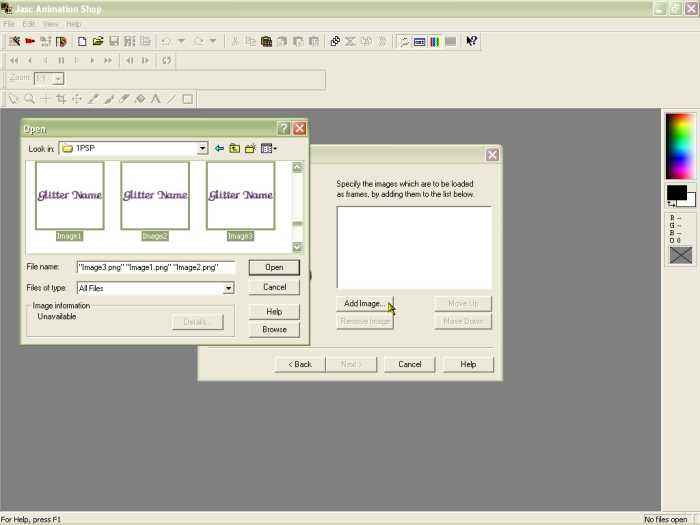
Now, we will add your images. Click on add, and find where you put your 3 (or more images) and while holding down your
control button, click on all of your images and click Open. You should then see you images listed in the white box, if not,
you can click add again and add the rest. Then click next & finish. Your images should be together. You can then click on
View and click on Animation, you will then see your name in action!
Now comes the finale, click on ‘Save As’ and name your animation. I usually save the name of the font I used
with my names, so I won’t forget what was used.
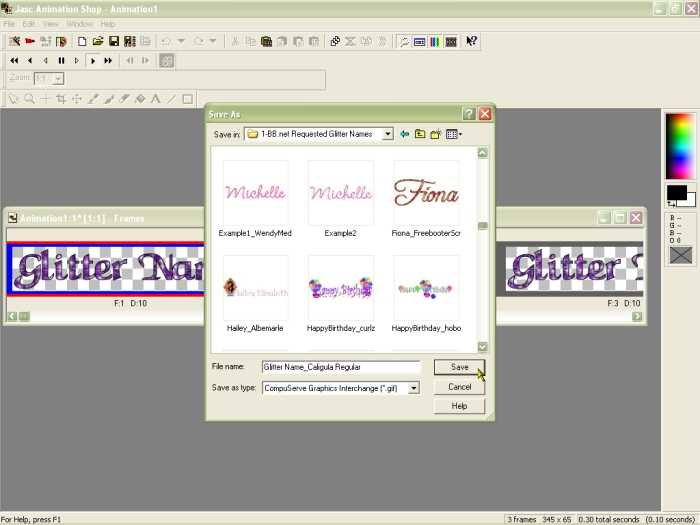
You will then see a box titled Animation Quality Versus Output Size. Click on the ‘Customize’ button.
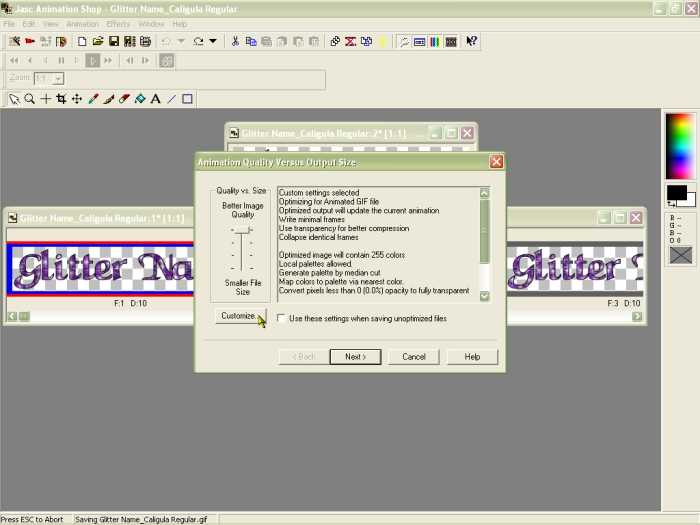
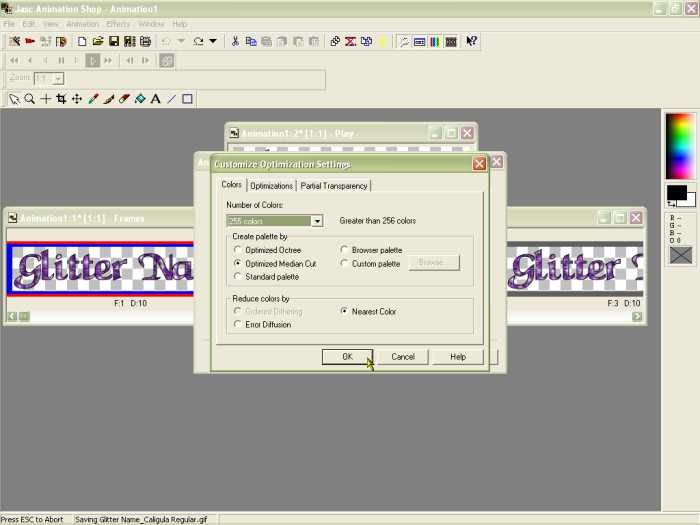
Under the Colors tab, choose 255 colors, Optimized Cut and Nearest Color. Then click on the Optimizations Tab and check
the middle 3 boxes.
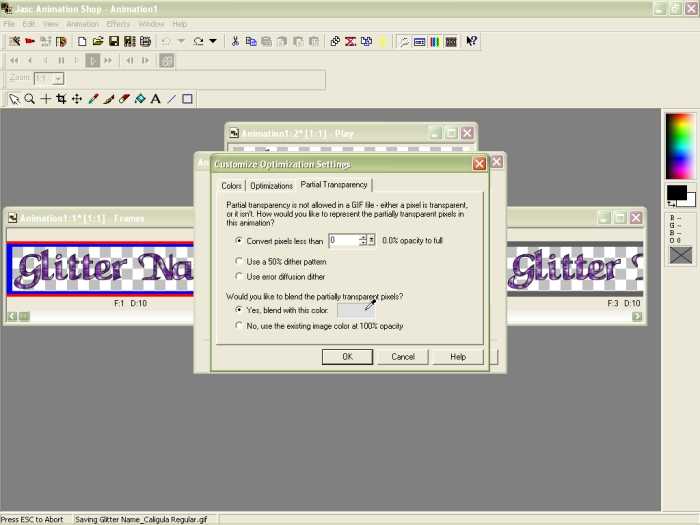
Under the Partial Transparency, click the Convert pixels less than and put the number on ‘0’. Then on the
bottom choose Yes, blend with this color and choose your color as a soft gray or white (will blend in with most backgrounds).
And then choose OK. It will take you back to the first box, click next 3 times and ... TA DA... your glitter name will be
saved and ready to use!
Here is my final product.
You can also flip it, use a gradient and glitter to make a name like this one with a stroke width of 3:
|